
Interaction Map Feature Officially Launches!
Bringing you what you need to make editing and viewing maps easier

Last summer, we released the beta version of the Interaction Map feature to give our users a better way to communicate their ideas to their teams and clients. Since then our team has been busy at work, coding away, making changes to the Interaction Map feature to provide you with a better, faster, and smoother experience. These improvements would not have been made possible without your input. So thank you to everyone who took time out to participate in our user interviews, surveys, and who shared their feedback with us! 😉
If You Haven’t Tried It Yet, Now’s the Time
To celebrate the official launch of the Interaction Map feature, we will be offering our Free and Starter plan users 2 weeks to test it out, starting today! 🎉
Trial duration: Monday, February 20th, 2017 (JST) ~ Monday, March 6th, 2017 (JST)
If after the 2-week trial you realize that it’s a feature that you can’t work without, upgrade your account by going to the settings icon and hitting Upgrade as the Interaction Map feature is available exclusively to Pro, Team, and Enterprise plan users.
Interaction Map Feature Recap
If you are new to Prott and are wondering what this is all about, the Interaction Map feature generates diagrams of all your screen interactions with a simple click of a button.
This feature is useful whenever you need to get your team and clients on the same page with the vision of the project or to help them understand the different flows.
It comes in handy as the changes are reflected immediately and can be shared by sharing an exported PDF or PNG files.
Below are five new additions and updates that we'd like to share with you. Keep on reading!
Added Convenience
1. Undo and Redo
We know we’ve all been there before. You make an edit to realize a second later that’s not what you wanted to do and you feel stuck because you can’t reverse it. Now, there’s no need to worry as you can simply retrace your steps by clicking the Undo and Redo icons.
Note: Please remember that if you decide to click the Reset to default button, followed by Undo, it will not take you back to the last edit that you made but will reset it back to the original setting.
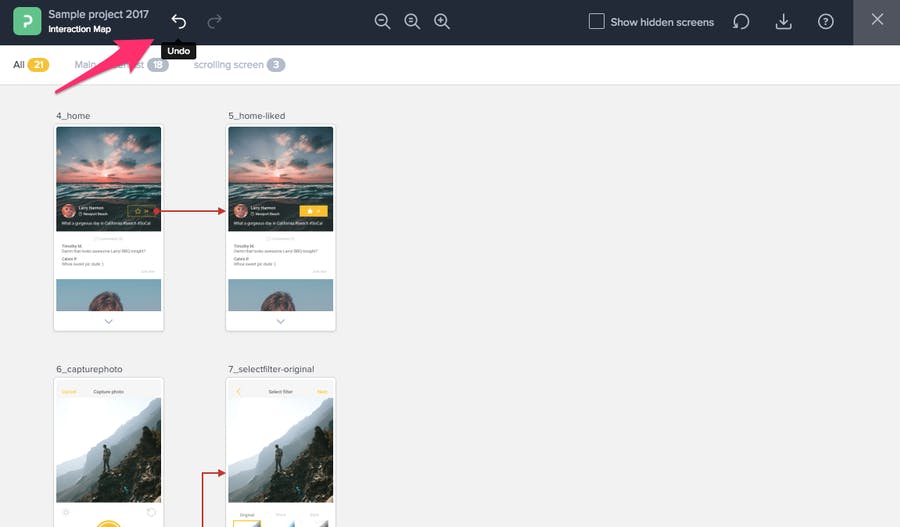
To undo and redo, click on the undo and redo icons located on the top panel next to the project name.
2. Switch to Other Edit Modes Directly from Within the Interaction Map
We also made it possible to switch directly to the comment, hotspot and wireframe modes. This means you no longer need to exit your interaction map but instead you will automatically be redirected to the respective edit modes, giving you a smoother workflow.
To access the three modes, hover over your screen for the three icons to appear below the screen. Click on the icon to go directly to the respective mode to begin editing or commenting. From the left, edit hotspots, add comments, edit wireframes.
Better Readability
3. Expand and Collapse Long Screens
When you include screens that are longer than others, it can make it challenging to view your interaction map clearly. We made it possible to expand and collapse long screens. With this flexibility, you can now control which long screens to leave expanded and which ones to collapse.
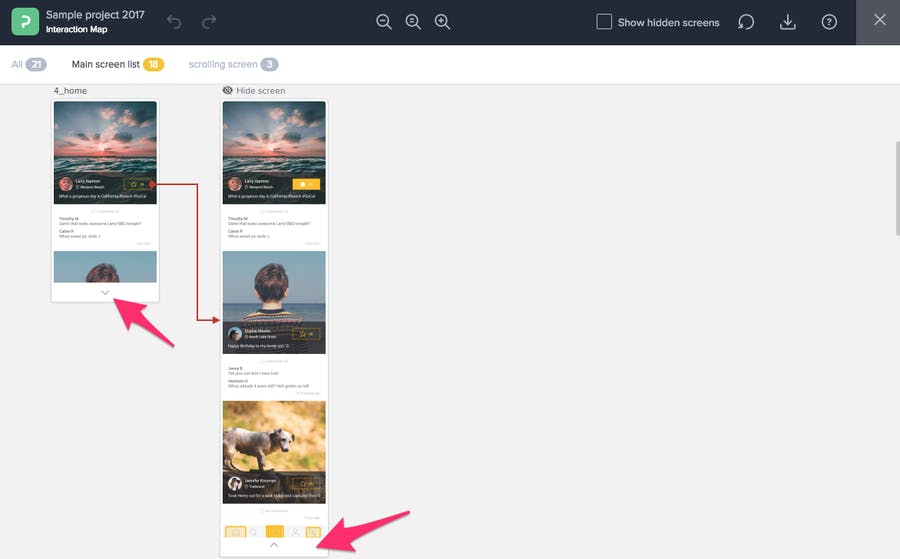
To collapse a screen, from the footer of the screen, click the up arrow. To expand the screen, click the down arrow.
4. Hide Screens
There’s that saying that goes, “out of sight, out of mind” and we feel this couldn’t be any truer for situations when you want to hide irrelevant screens from your map.
To hide a screen, simply hover over the label of your screen and hit Hide screen. To bring back the screens you’ve hidden, check the Show hidden screens box.
5. Show Only What Matters
When you have a project that contains multiple hotspots for each screen, it’s easy to get lost in the sea of red lines crossing in and out of the screens. The solution for this? Hide the hotspots located near the header and footer of the screen by default. This significantly clears away the noise allowing you to focus on the main interactions that matter the most. 👌🏼
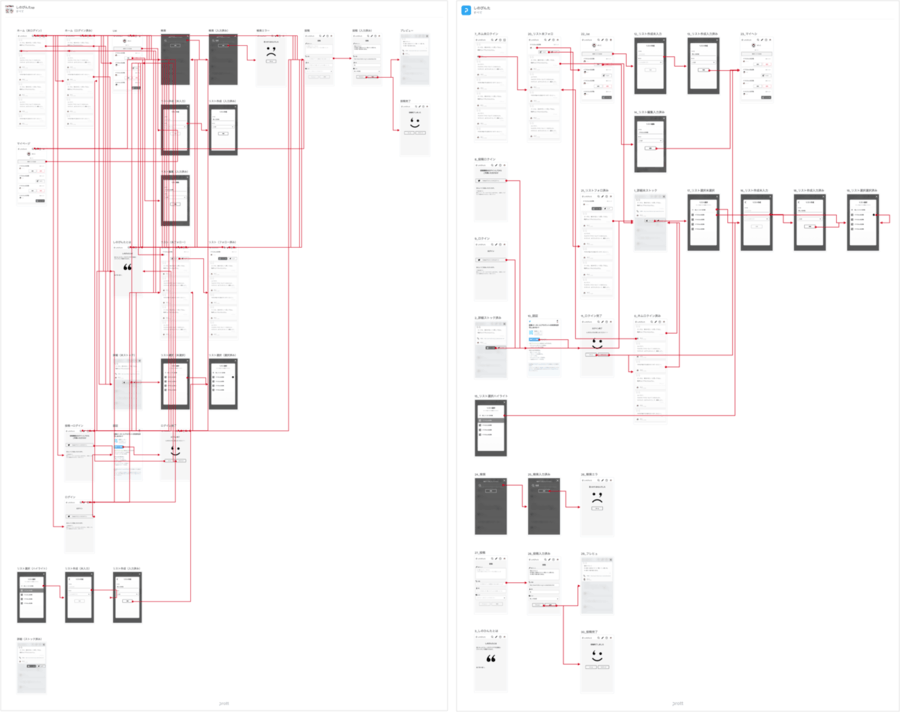
The interaction map on the left includes hotspots from the header and footer and the map on the right is after the hotspots from the header and footer have been hidden by default.
All hotspots located near the header and footer will be hidden by default. To view the hotspots that have been hidden, hover over the hotspot and gently click the highlighted area for the hotspot to appear.
To find out more on how to use the Interaction Map feature, check out our awesome help page here.
If you have any questions or comments about the Interaction Map feature, feel free to reach out to us at anytime on chat or via email.
Thanks for checking this blog post out and happy prototyping 💛